
Plask to Maya: Importing a FBX file
Importing FBX files into Maya from Plask can be a straightforward process, but there are a few nuances to keep in mind, especially when dealing with multiple animations in a single FBX file. In this article, we'll walk you through the workflow required to successfully import and manage your custom mocap animations in Maya.
Understanding the Plask FBX Export
When exporting mocap animations from Plask, the resulting FBX file may contain:
- The custom mocap animation you created.
- A "T Pose" animation.
Maya's default import settings don't allow you to select which animation to load. So, if you're unsure, before you import the FBX file into Maya, it's helpful to inspect it in another 3D software, such as Blender or MotionBuilder, to understand what animations were included.
Importing the FBX into Maya
Maya's default import process (File > Import) does not allow you to select specific animations, which can result in only the last animation in the FBX file (often the "T Pose") being imported. To ensure all animations are imported, follow these steps:
-
Import the FBX File:
- Go to
File > Importand select your FBX file.
- Go to
-
Import as Animation Clips:
- Open the Time Editor window (
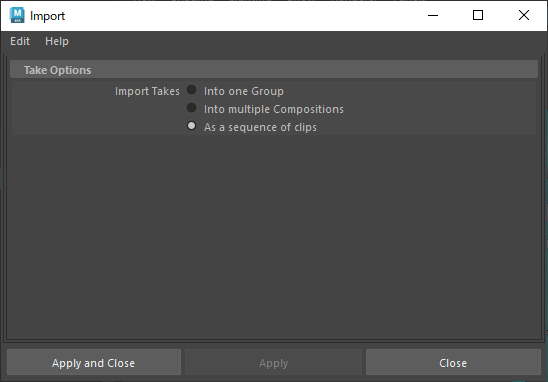
Time Editor > File > Import Animation Clip…). - In the Take Options prompt, select “As a sequence of clips.”
- Open the Time Editor window (
-
View the Animations:
- Both animations (the custom motion and the "T Pose") will now be visible in the Time Editor, allowing you to work with them as separate clips.
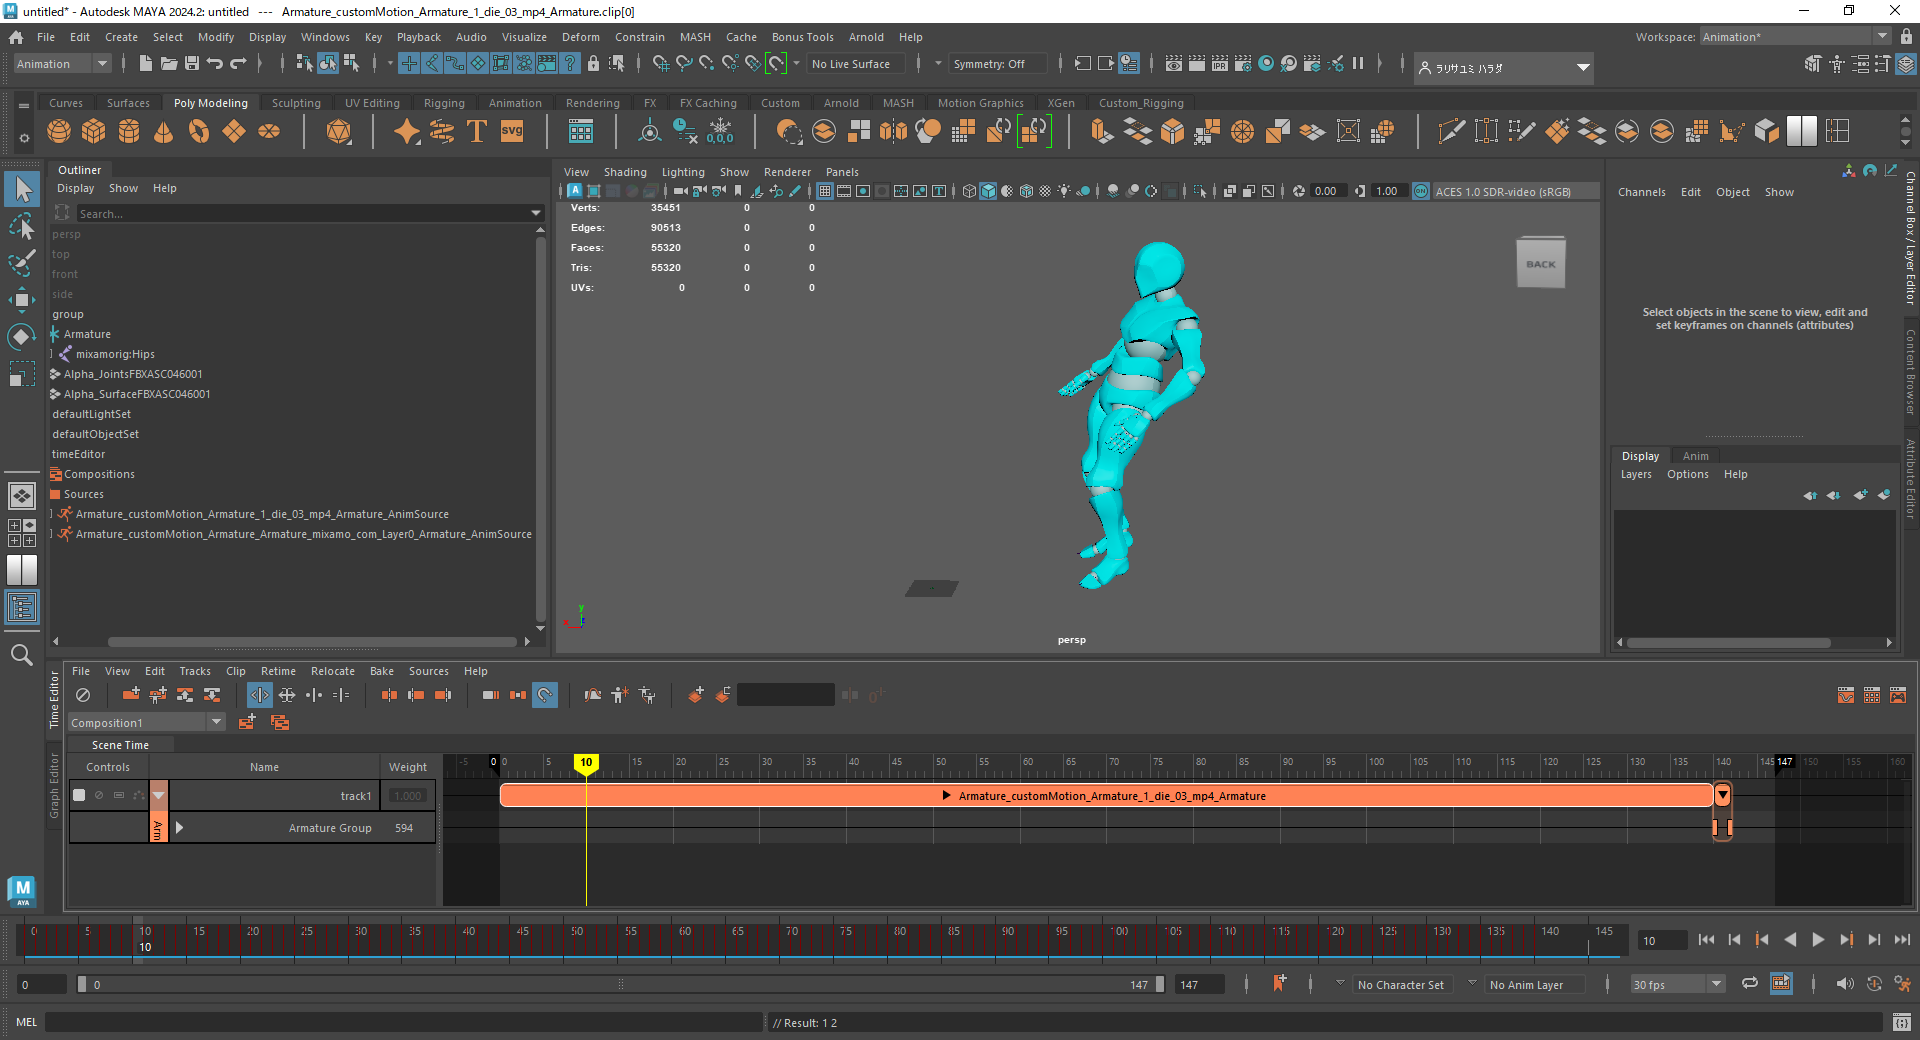
Once the animations are imported into Maya, you can bake the animation to the skeleton and edit it to fit your needs. This process allows for greater flexibility when working with multiple animation takes within a single FBX file.
We hope you found this guide helpful. If you have any further questions or suggestions for improving this process, please feel free to write to us at support@plask.ai